
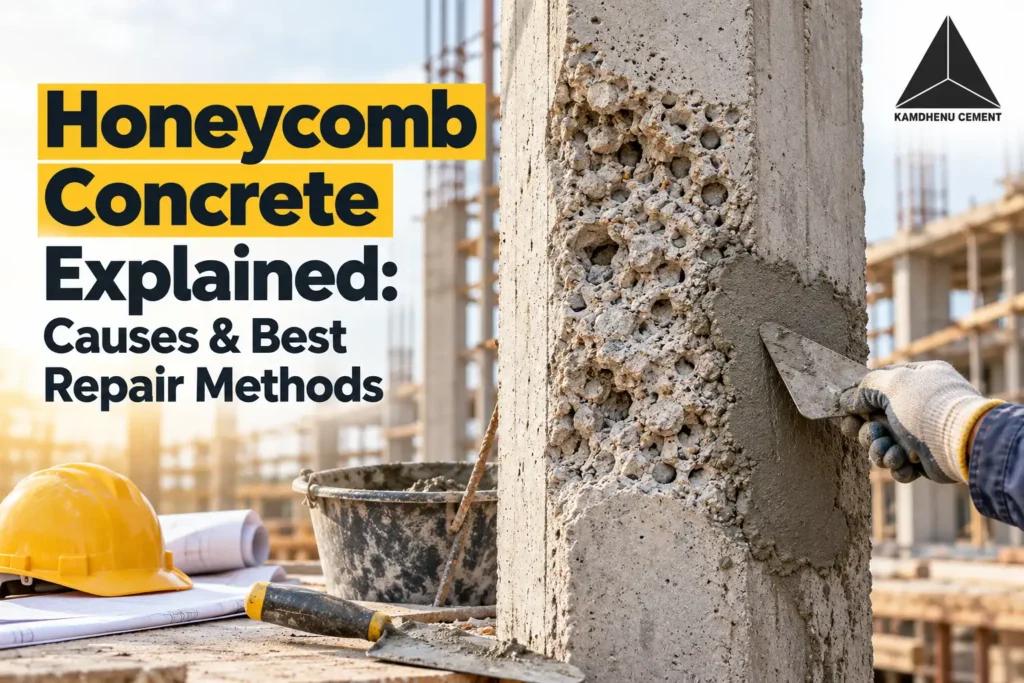
The wooden forms pull away. You expect a flawless, solid grey surface. Instead, a cluster of exposed stones and empty cavities stares right back at you. That ugly, gravelly patch is honeycomb concrete. It looks terrible, but treating this merely as a cosmetic flaw is a massive mistake. The rough cavity you see outside is just a symptom. The real issue hides inside, involving poor cement flow, clumsy compaction, leaky formwork, congested rebar, or sloppy placement. This guide dives into how these voids form, exact causes, common locations, inspection tactics, repair protocols, and prevention techniques.
What Is Honeycombing in Concrete?
You pour a mix be it cement, ready mix concrete, or OPC/PPC cement; expecting the sticky mortar paste to completely coat the chunky gravel. When that fails, hollow gaps get left behind. Those missing pockets define this defect in practical construction terms. A true honeycombed patch goes beyond a few tiny surface blowholes. Small pinholes are normal trapped air. A massive cluster of bare aggregate means the mortar completely abandoned its post. Seeing rough stones on the outside rarely reveals the true depth of the problem beneath.
Honeycomb Structure in Concrete
Think of a rigid sponge made of rocks. A honeycomb structure in concrete takes shape when air pockets, trapped gravel, and mortar-starved zones link together. This creates a weak, porous mass. Inspectors sometimes call a closely related condition concrete rock pockets, where heavy stones gather in one spot while the lighter paste washes away.
How Honeycombing Forms
Going from wet sludge to a solid wall requires perfect harmony. When one step stumbles, cavities grow.
Formation Flowchart:
Concrete mix
↓
Transportation
↓
Placement
↓
Flow around reinforcement
↓
Compaction
↓
Formwork containment
↓
Curing
↓
Hardened concrete
Where the Process Can Fail
A stiff mix, blocked paths, tight steel bars, lazy vibration, leaky formwork, or bad dropping angles all ruin the pour. Construction experts know honeycombing is caused by a chain reaction of these site blunders, not just a single unlucky accident.
Why Does Honeycombing Happen?
Mix and Workability
A batch that feels too stiff will never slide into tight corners. Badly proportioned ingredients or the wrong gravel size always spell trouble. While dumping extra water seems like a quick fix to make things flow, doing so causes segregation. You get soupy water on top and bare rocks at the bottom. True workability requires exact chemical control, not a random water hose.
Reinforcement Congestion
Steel grids give a structure its strength. But tightly packed bars act like a sieve, blocking large stones from passing through. Beam-column junctions are notorious for this. A batch that flows beautifully into an open trench might choke completely when poured into a heavy steel cage.
Formwork and Shuttering
Wooden or steel shutters hold the liquid mass in place. If joints sit loose, the precious liquid paste leaks out, leaving only dry rocks behind. Poorly braced walls, dirty panel faces, or leftover debris inside the cavity also block the flow.
Placement and Compaction
Dropping heavy loads from high above separates the heavy stones from the light paste. Once poured, the mass needs a mechanical vibrator to shake out trapped air. Shoving the needle in randomly, missing spots, or pulling it out too fast traps massive air pockets. However, vibrating a terrible mix will never magically fix it.
Types of Honeycomb in Concrete
Kamdhenu Cement classifies these defects by how deep they reach, not merely by how ugly they look on the surface.
Severity Diagram:
Surface (Shallow) → Deep (Subsurface) → Reinforcement-Exposed → Severe (Extensive structural loss)
Surface Honeycombing
These shallow pits reveal a bit of bare gravel. You usually spot them the exact moment workers strip the wood away.
Deep Honeycombing
Here, the void sinks well below the outer skin. This raises alarms, especially if structural steel sits nearby.
Severe Honeycombing
Massive, interconnected hollows mean a huge loss of solid material. The steel bars might be completely naked. At this stage, you need an engineering assessment, not a patch job. Repair decisions must evaluate depth, extent, location, and structural load.
Where Does Honeycombing Usually Appear?
Honeycomb in Building
Finding a honeycomb in building projects is common across foundations, walls, and slabs. The member’s function and location dictate what happens next. A tiny cavity on a garden wall means little, but the exact same hole on a high-rise foundation demands serious attention.
Honeycomb in Column
Vertical pillars take a beating. Heavy steel cages, hard-to-reach bottoms, and sharp corners make pouring difficult. A honeycomb in column happens because getting a vibrator deep down into a narrow box is remarkably tough.
Honeycomb Concrete Column
These vertical supports hold the entire floor above them. A honeycomb concrete column loses its fire protection and structural strength if the steel gets exposed to the air. Smearing some cement paste over it fixes absolutely nothing.
Column Honeycomb
Inspectors must check every vertical face immediately after shutter removal. A column honeycomb requires a careful look at the corners, looking for bare steel, exposed aggregate, and crumbly edges.
Honeycomb in Beam
Horizontal supports trap air near the bottom steel and tight stirrups. A honeycomb in beam frequently pops up right where the beam meets a vertical pillar, as the steel congestion there is extreme.
Honeycomb in Slab
Floors and ceilings suffer too. A honeycomb in slab usually hides underneath, right around the heavy tension steel, edges, openings, and congested zones.
Honeycomb in Timber and Brick: Are They the Same?
Let us clear up some industry confusion across different materials.
Honeycomb in Timber
Woodworkers use this term for internal cracks caused by bad kiln drying. A honeycomb in timber has absolutely zero connection to cement problems.
Honeycomb Brick
Builders buy a honeycomb brick on purpose. These blocks feature manufactured cellular holes for insulation and weight reduction. This is a factory-made product, not an on-site pouring mistake.
How to Inspect Honeycombed Concrete
You strip the forms. Now the real work begins. Staring at the wall tells you nothing about what lies inside.
Look Beyond the Surface
Grab a chipping hammer. Check for loose gravel, crumbly edges, mortar-deficient areas, and naked steel. If pieces easily flake off, the rot goes deeper.
Determine the Extent
Assess the approximate surface area. Dig back until you hit hard, unyielding material. Check if the steel ties sit exposed or if multiple cavities link together underground.
Don’t Cover It Too Soon
Slapping wet plaster over a hole hides the danger. Concealing a flaw is completely different from fixing a defect. Do not render or patch until a full inspection occurs.
Honeycomb Concrete Repair: Choosing the Right Method
Repair Decision Tree:
Defect found
↓
Inspect and expose affected areas
↓
Sound material underneath?
↓
Yes → Localised patch
No/deep → Engineering assessment
↓
Reinforcement exposed/structural section compromised?
↓
Yes → Structural repair strategy
Minor Surface Defects
Chip away the loose debris. Reach solid ground. Wash away the dust. Apply the chosen repair material, pack it tight, and keep it wet so it cures. Fixing a superficial honeycomb concrete patch requires clean substrates above all else.
Deep or Internal Voids
When holes dive deep, standard mortar fails. You need non-shrink grout or micro-concrete to flow into the hidden cracks. Match the material to the specific site requirements.
Severe Structural Defects
Massive damage calls for an engineering assessment. You might need to cut out huge chunks, treat rusted steel, set up new wood, and pour fresh micro-concrete jackets to save the structure.
Concrete Honeycomb Repair Method Statement
Here is your exact 7-step sequence to get the job done right.
Step 1: Mark the Defective Area
Identify the complete affected zone before anyone swings a hammer.
Step 2: Remove Unsound Concrete
Chip backward carefully until your tools strike hard, flawless material.
Step 3: Clean the Surface
Blast away all dust, loose flakes, laitance, and chemical dirt.
Step 4: Inspect Reinforcement
Look closely at the steel bars. If they sit exposed, they need rust treatment.
Step 5: Apply the Approved Repair Material
Use the precise grout or micro-batch specified for that specific depth.
Step 6: Compact and Finish
Make certain the patch job itself does not trap new air bubbles.
Step 7: Cure and Inspect
Keep the fresh patch wet per the guidelines, then verify the final strength.
Why Plastering Over Honeycombing Is Not a Real Repair
A flat, painted surface gives a dangerous illusion of safety. Wet plaster merely covers the ugly rocks. The empty caves still sit underneath. The steel bars still lack their protective alkaline blanket. Water will eventually find those empty paths, rusting the metal from the inside out. The core structural failure remains totally ignored.
Hide the Defect vs Repair the Defect
| Cosmetic Covering | Actual Repair |
| Hides the cavity | Removes unsound concrete |
| Improves appearances | Restores the affected area |
| Leaves internal voids | Addresses the actual defect |
| Ignores structural weakness | Requires assessment and suitable material |
How to Prevent Honeycombing Before It Starts
Stop the problem before the mixer even turns on.
Pre-pour Checklist:
| Category | Action Required |
| Mix | Appropriate workability, correct proportions, correct aggregate size. |
| Formwork | Tight joints, proper alignment, clean faces, zero leak paths. |
| Reinforcement | Adequate spacing, correct cover blocks, clear drop paths. |
| Placement | Systematic pouring, low drop heights, careful vibration. |
| Inspection | Strict water schedules, immediate check after stripping. |
Check the Mix
Demand proper flow characteristics. Verify the gravel sizing. Stop crews from secretly hosing extra water into the truck.
Check the Formwork
Seal every joint. Brace the walls tight. Sweep the bottom clean so no paste escapes.
Check Reinforcement
Leave enough room for the rocks to fall through. Keep the cover blocks secure so the vibrator needle actually fits.
Control Placement and Vibration
Pour in careful layers. Never drop a load from ten feet high. Vibrate methodically, paying intense attention to heavy steel zones.
Cure and Inspect
Keep the blocks wet. Pull the wood off on schedule and inspect everything before the finishing crew arrives.
Kamdhenu Cement: A Construction Partner Beyond Cement
For businesses managing heavy material transport and evaluating logistics or supply chain partners, selecting a reliable source matters. Quality builds start with dependable materials. Whether your site requires Ordinary Portland Cement, Portland Pozzolana Cement, Portland Slag Cement, or direct Ready Mix Concrete, a trustworthy partner makes a massive difference.
Kamdhenu Cement operates advanced manufacturing and quality-testing facilities, backed by an extensive distribution network. Producing flawless structures demands absolute control over the pouring process, not just a single bag of powder. When you need a steady supplier for your materials such as cement, ready mix concrete, or OPC/PPC cements; Kamdhenu delivers the foundation you need. Pairing great site practices with premium supplies is the best way to banish honeycomb concrete for good. Visit: Kamdhenucement.com
In Conclusion
Ultimately, those ugly gravel patches represent a failure in execution, not just a cosmetic annoyance. Finding honeycomb concrete means you must inspect deeply, refuse cheap plaster cover-ups, and select a targeted fix based on real structural facts. Stop the cycle entirely by controlling your mix, your pour, and your vibration from day one.
Acronyms Used
| Acronym | Full Form |
| RCC | Reinforced Cement Concrete |
| RMC | Ready Mix Concrete |
| OPC | Ordinary Portland Cement |
| PPC | Portland Pozzolana Cement |
| PSC | Portland Slag Cement |
| IS | Indian Standard |
| BIS | Bureau of Indian Standards |
| QA/QC | Quality Assurance / Quality Control |
FAQs
- Is honeycomb in column dangerous?
Answer: Deep honeycomb in column can weaken the section and expose reinforcement, so it should be inspected before repair. - Can honeycomb in slab be repaired?
Answer: Yes, minor honeycomb in slab can usually be repaired after removing loose concrete and preparing the affected area. - What causes honeycomb in beam?
Answer: Honeycomb in beam is commonly caused by poor compaction, reinforcement congestion, improper placement, or formwork leakage. - What is the best honeycomb concrete repair method?
Answer: The right honeycomb concrete repair method depends on the defect’s depth, extent, and reinforcement exposure. - What are the types of honeycomb in concrete?
Answer: The main types of honeycomb in concrete are shallow, deep, and severe honeycombing, based on their extent and depth.